Blender Smooth
Smooth all selected vertices with Blender’s standard smoothing.
BLENDER ADD-ON / cvELD X-Ray X-Loop
Directional loop selection, through-mesh regions, component tweaking, and a customizable pie menu — with familiar shortcut presets for Blender.
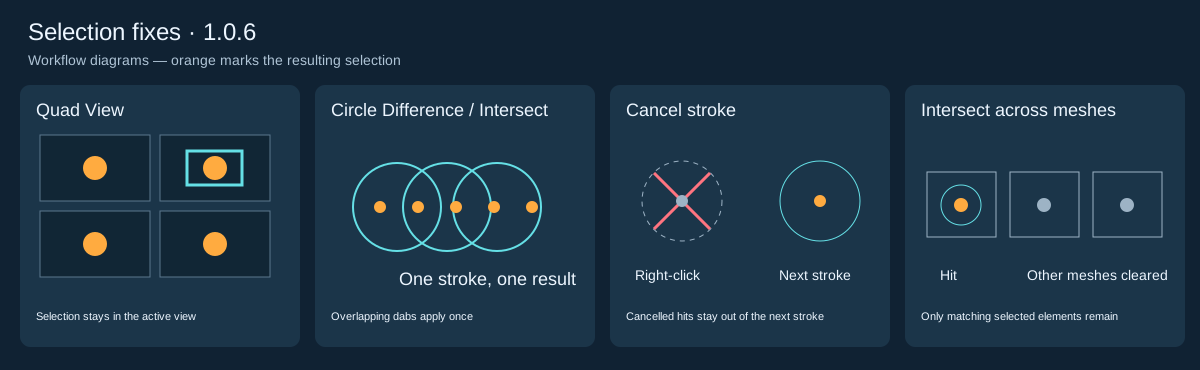
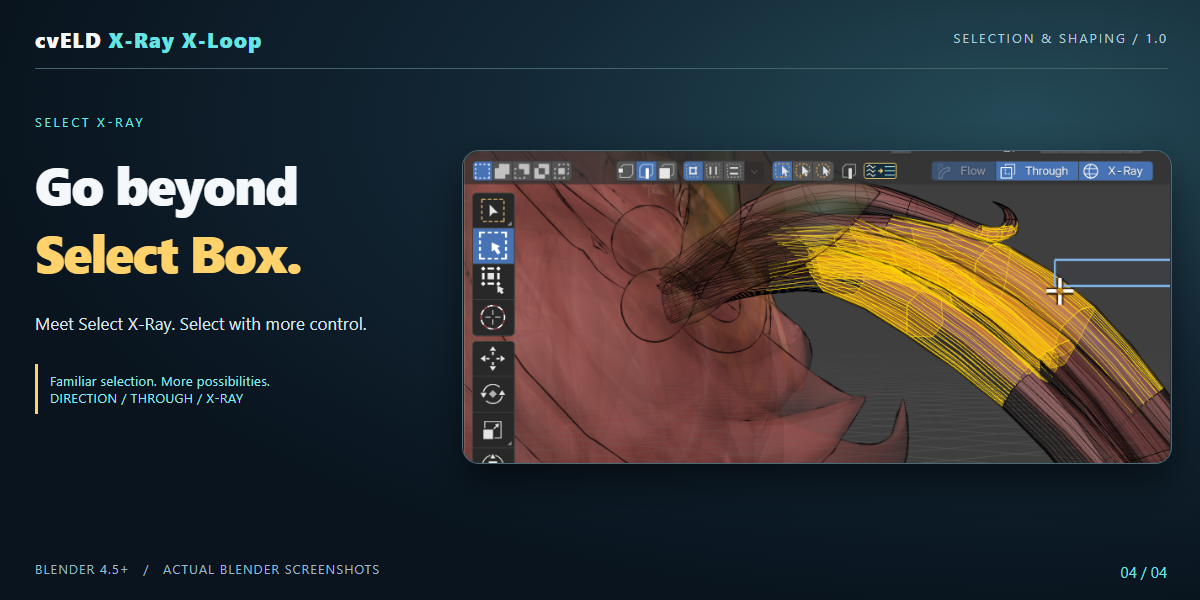
Select X-Ray targets the view you use in Quad View. Circle Difference and Intersect apply once to the whole stroke. Right-click cancels its pending hits. In multi-object Edit Mode, an Intersect click also clears nonmatching selection in other meshes; clicking empty space clears the selection.
Choose Select X-Ray in Edit Mode, then open the wide Loop Shaping button. Its icon and name make the menu easy to find.

Fixes misplaced or oversized header artwork and exposed coloured markers. The icon and label use a standard Blender button.
Component Tweak is a core feature alongside directional selection: it detects vertices, edges, and faces beneath the cursor so you can move them without repeatedly switching component types.
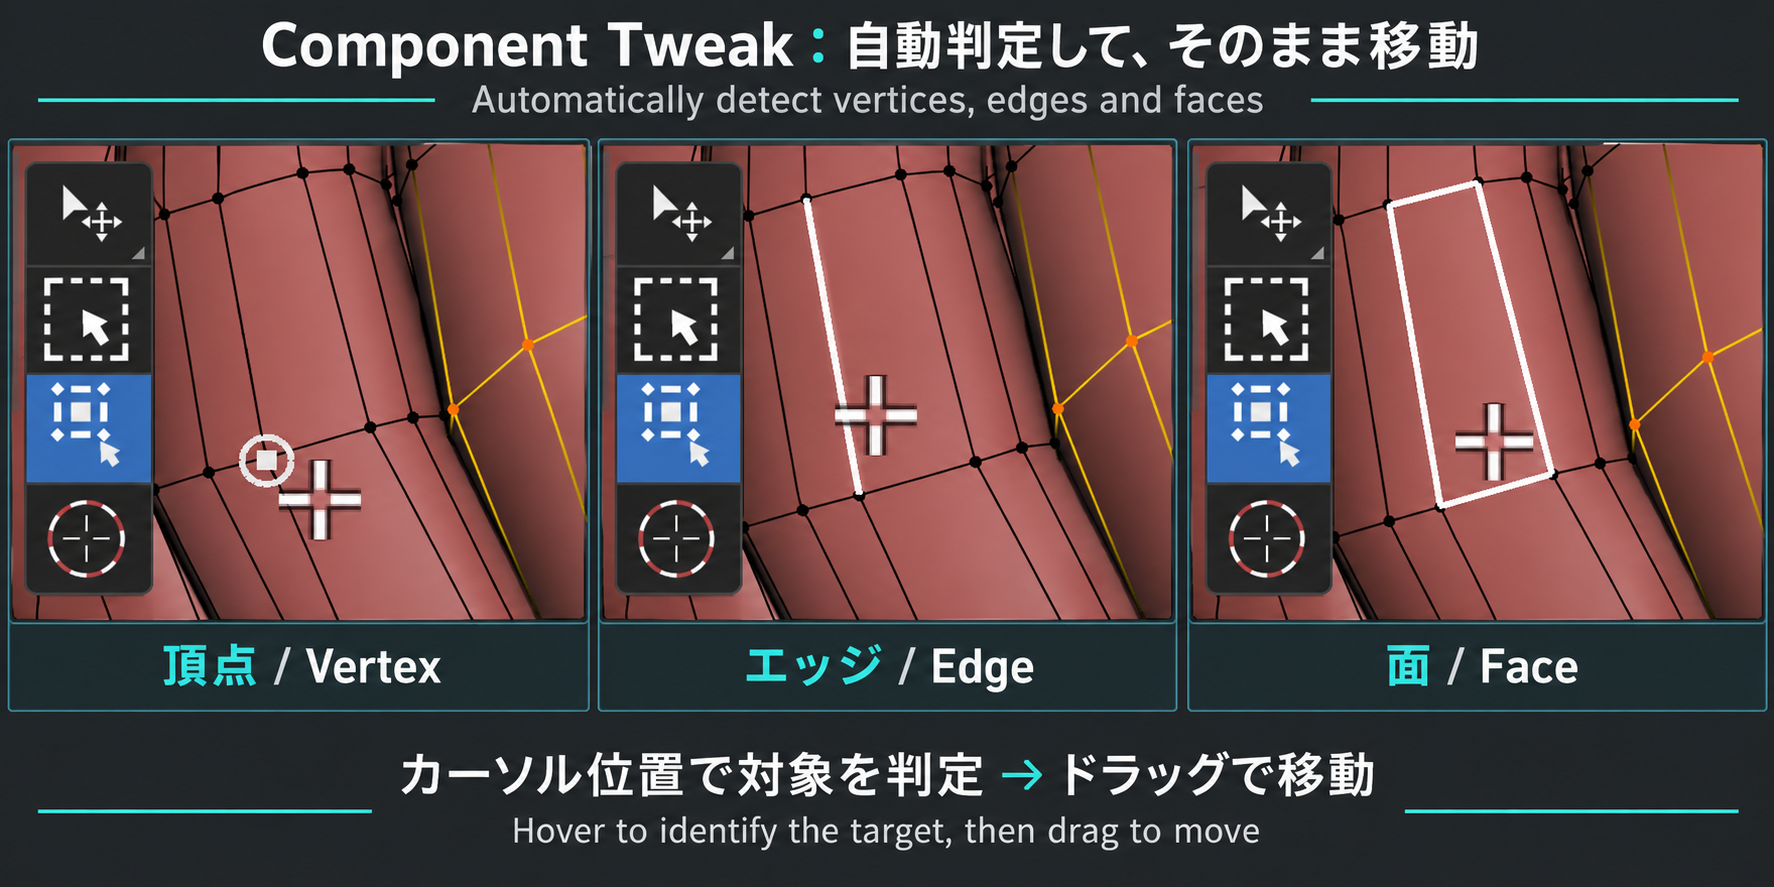
Component Tweak starts with Through and X-Ray off. Turn them on in its header when needed; saved per-tool choices are preserved. Select X-Ray keeps its separate defaults.
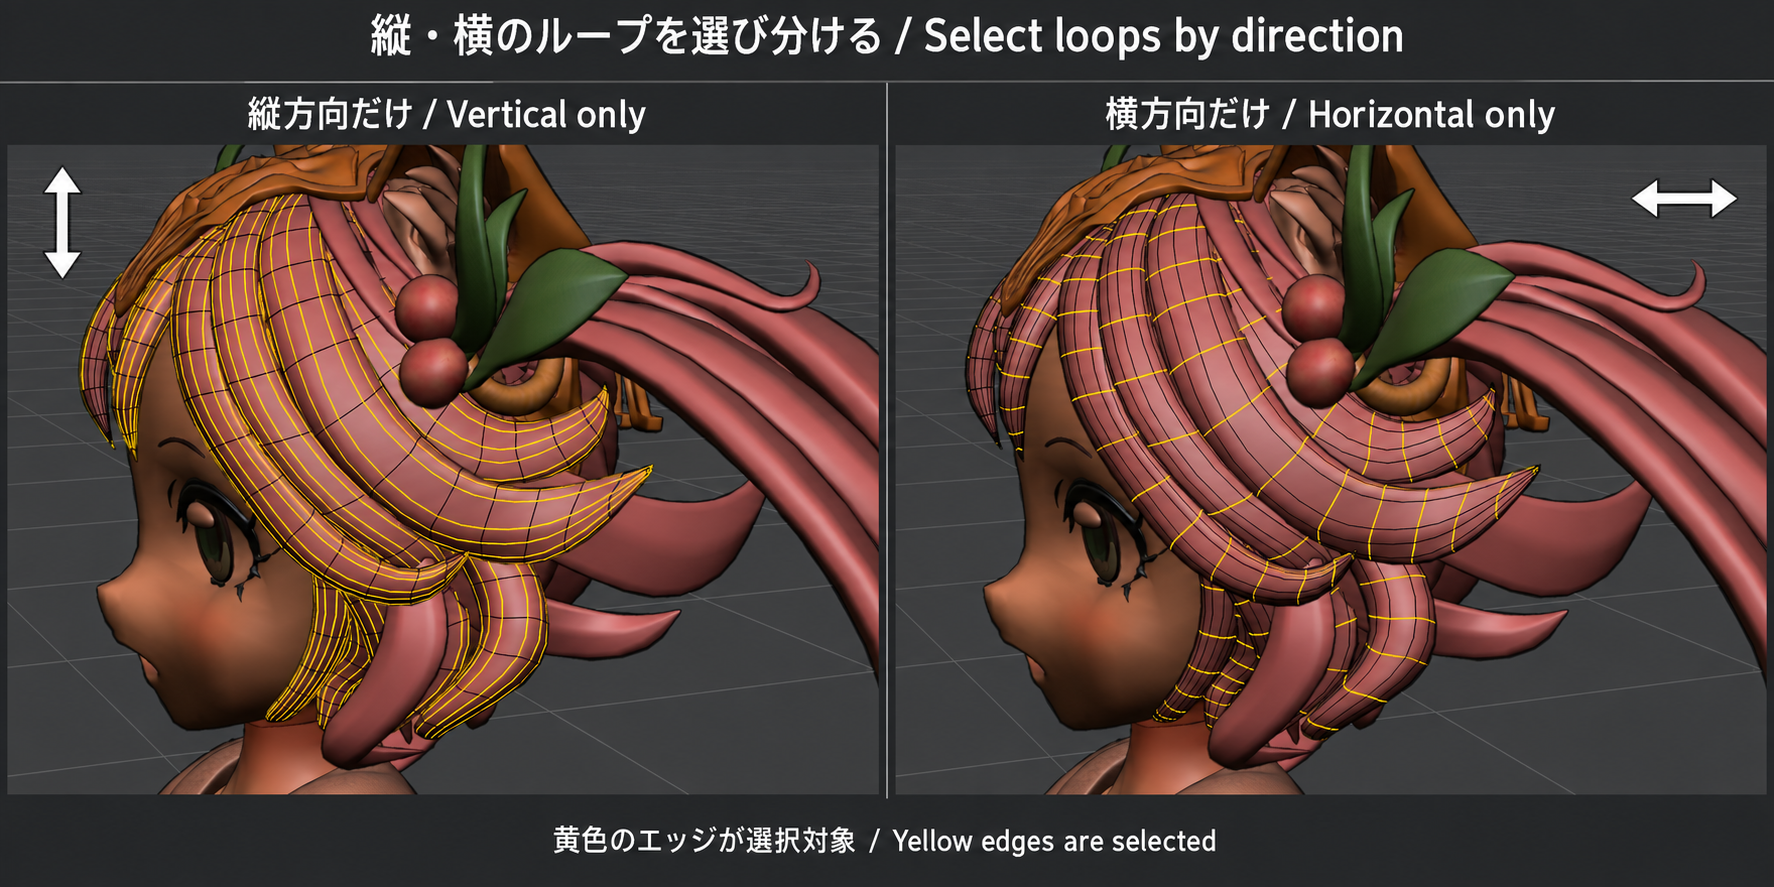
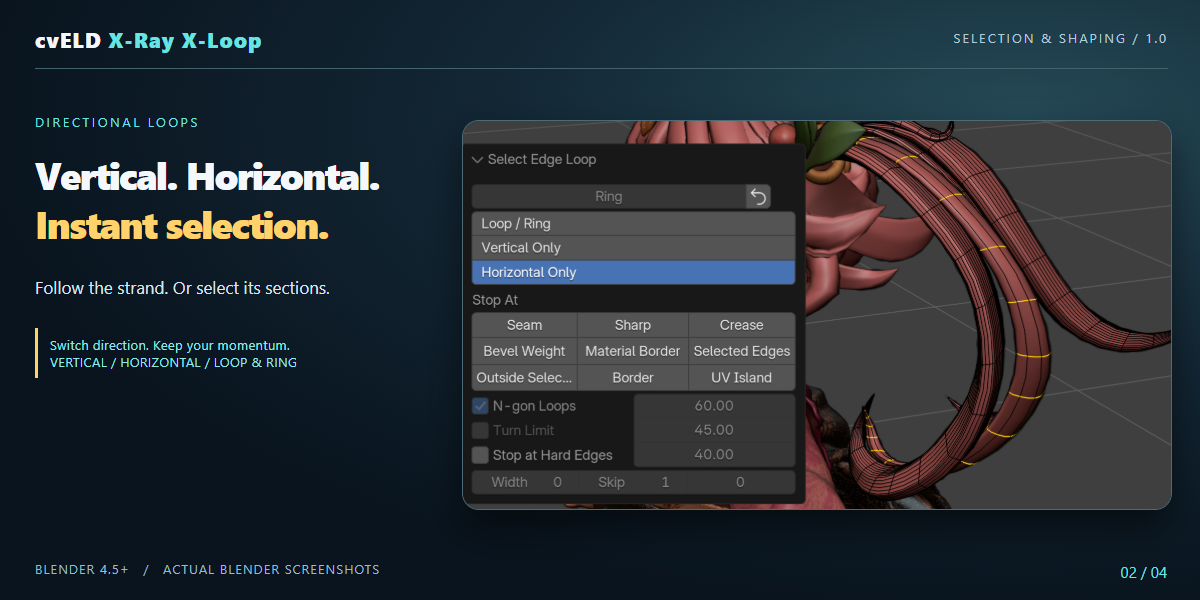
Choose the loop direction you need. The comparison shows the two selection patterns on the same mesh.
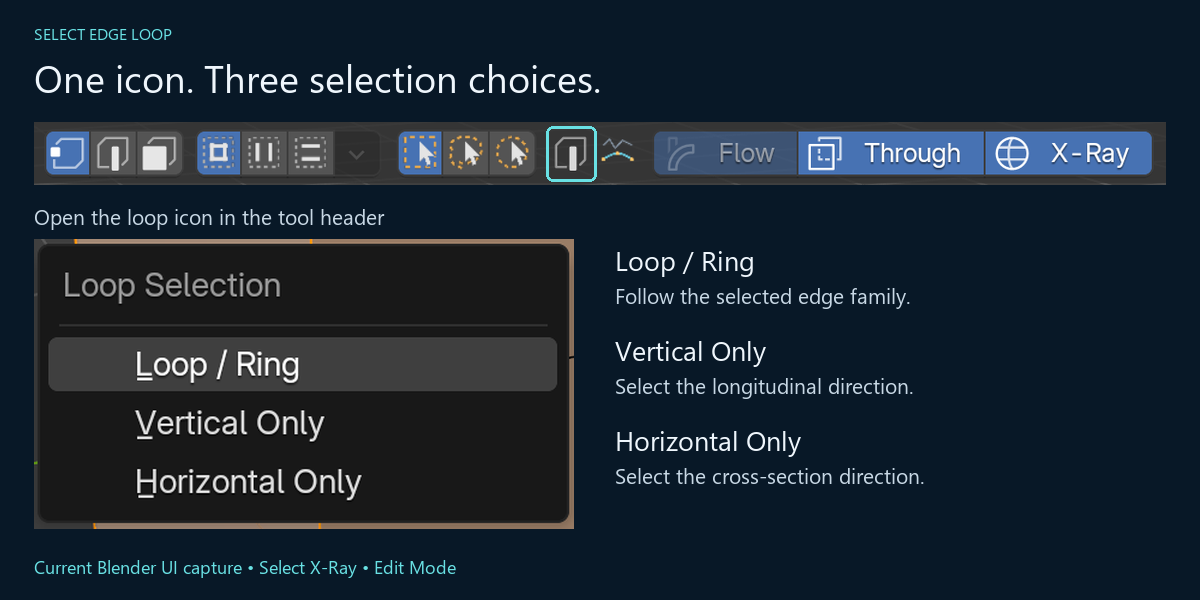
Open the loop icon in the Select X-Ray tool header to choose Loop / Ring, Vertical Only, or Horizontal Only. The redo panel keeps the Ring setting beside the same direction choice.
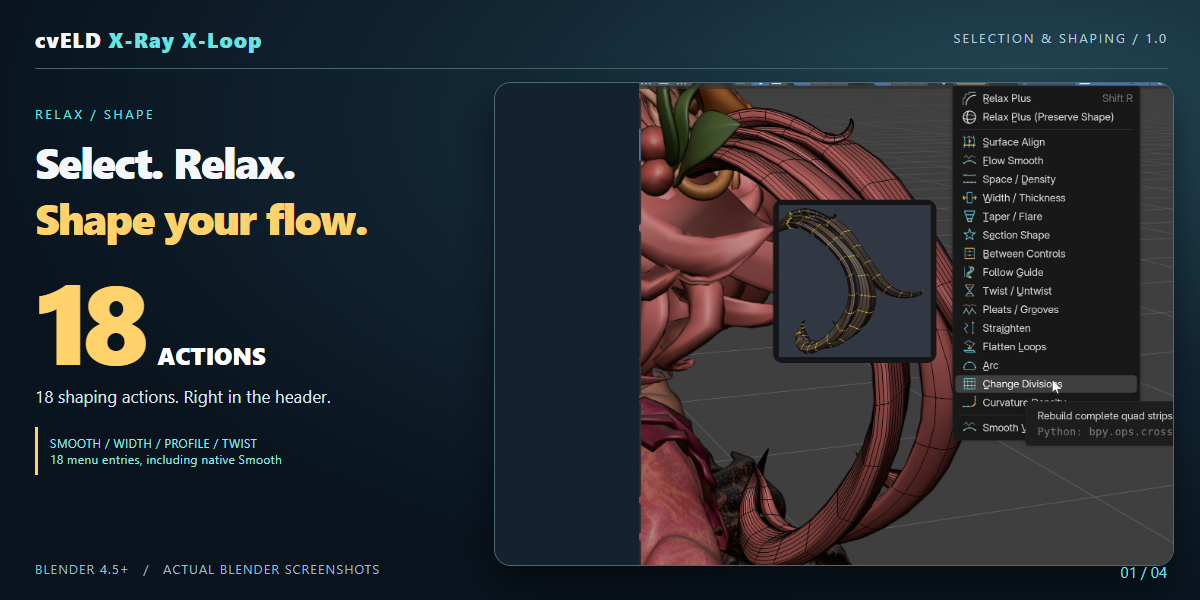
Two Relax Plus modes and fifteen loop-shaping tools. Hover over a preview to see its three-second result. Open the dedicated icon pie with Ctrl+Alt+R in Edit Mode. Each clip shows real Blender operator evaluations on a character mesh.
Smooth all selected vertices with Blender’s standard smoothing.
Spread clustered vertices over the original surface while protecting corners. This is surface redistribution, not exact volume preservation.
Smooth the selected loop direction to refine the flow.
Compatible parts processed; other parts kept.
Redistribute cross sections along the strip for more even spacing.
Compatible parts processed; other parts kept.
Move existing sections toward stronger bends without changing their count.
Compatible parts processed; other parts kept.
Adjust the width of selected sections.
Compatible parts processed; other parts kept.
Blend the section size from root to tip.
Compatible parts processed; other parts kept.
Reshape suitable sections into a circle, box or star. Use enough vertices for the profile.
Blend intermediate sections between the end shapes.
Align the flow to a chosen curve or wire guide.
Rotate sections progressively along the flow.
Compatible parts processed; other parts kept.
Adjust the depth of longitudinal ridges and grooves.
Compatible parts processed; other parts kept.
Straighten selected rows while retaining their endpoints.
Bring selected rows onto a common plane.
Bend selected rows into an arc.
Change the number of divisions on compatible strips. Adjust the count in the popup or redo panel.
Compatible parts processed; other parts kept.
Slide selected cross sections along existing edges to align their height without flattening thickness. Curved faces may change slightly.
In Edit Mode, select the vertices for Relax Plus, or select one edge-loop direction for loop shaping. Use the N-panel buttons or the Loop Shaping menu in the mesh header. Hover over an individual tool for a compact, square, three-second MP4 preview. Moving the pointer or clicking dismisses it. Blender tooltips must be enabled.
Buttons execute immediately. Division Count opens a numeric adjustment popup; other settings can be adjusted with F9. For Surface Relax, selecting the whole intended surface gives a clearer density redistribution result. Corners, boundaries and disconnected parts constrain movement. Exact scalar volume and perfectly uniform edge lengths are not guaranteed.
Section Shape needs meaningful section selections and enough vertices. Division Count depends on strip topology; unsupported reductions and shape-key/Multires cases may be skipped. Best-effort processing keeps compatible results so you can repair the remaining parts separately.
A three-second demonstration on a real hair mesh with multiple cross-section rows selected. Uneven rows slide along the original longitudinal edges to align their levels. Hover to play.
Open Loop Shaping from the wide, labelled button in the tool header. If no compatible shaping changes are found, a dialog offers Vertical Loops or Horizontal Loops from the current selection. Choose a direction and confirm to change the selection only, then run shaping again. Cancel keeps the selection. Unsupported connectivity or missing seed edges can still prevent a loop selection.
Three-second edited comparison of initial, vertical and horizontal selections on an MCP-created sample. These are actual operator results, not a continuous mouse recording.
18 header menu actions: 15 loop-shaping tools, two Relax Plus modes and native Smooth.
Choose longitudinal loops or cross sections from the current selection.
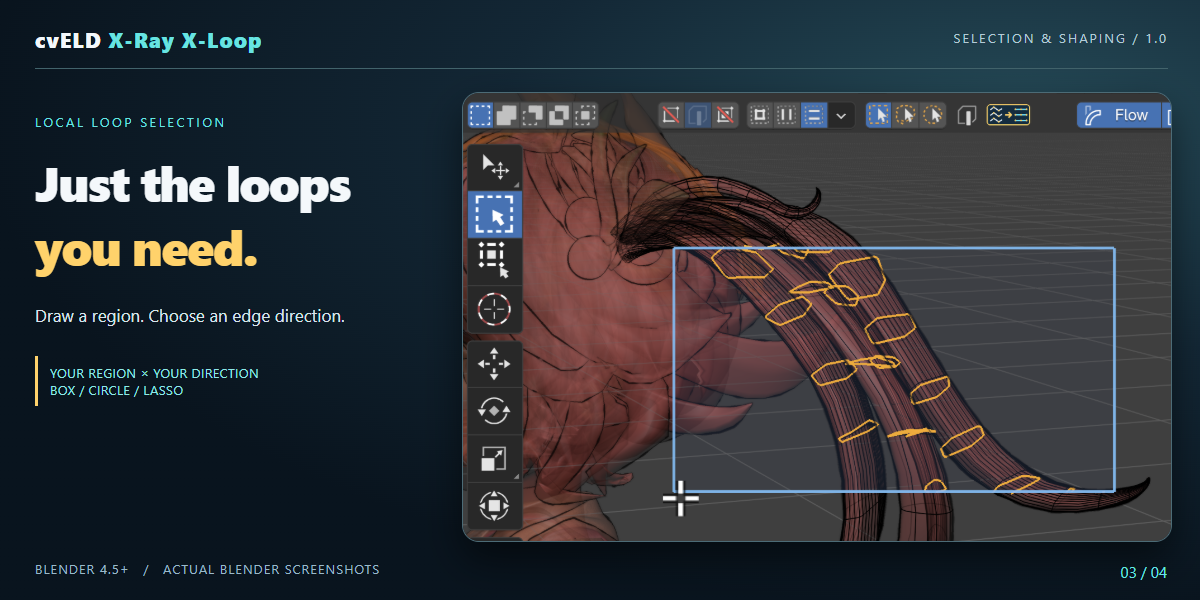
Combine box, circle or lasso regions with an edge direction to select the area you want.
Select X-Ray adds directional control, through-selection and X-ray display to familiar region selection.
In Preferences > Add-ons > X-Ray X-Loop > Shortcuts, choose the Softimage preset. Press T, E, or U for point, edge, or polygon X-Ray selection, and M for Component Tweak. The preset brings familiar selection controls; it does not replace every Blender operation with Softimage behavior.
The Softimage preset uses Ctrl + Alt + B for region selection and Shift + Right Mouse for the pie menu. Key assignments are configurable.
Use Edit Mesh for component and loop selection. In Weight Paint, Vertex Paint, and Texture Paint, prepare selection masks for Blender’s brushes. The add-on does not paint weights, colors, or image pixels itself.
Current add-on version: 1.0.6. Minimum Blender version declared by the add-on: 4.5.0. Screenshots show Blender usage; appearance varies with theme and language.